Overview
Altera's Quartus Pro recently began supporting an embedded JTAG debugger / programmer based on FTDI FT2232H and FT4232H devices. This solution is referred to as "USB Blaster III". An example of this solution can be found on the Agilex 5 FPGA E-Series 065b Modular Development Kit Board SOM Schematic.
This is great news for various reasons, such as being able to include a JTAG hardware debug circuit directly on target hardware rather than relying on an external JTAG dongle, such as a relatively expensive Altera USB Blaster II. Another nice outcome is being able to use an FTDI Mini Module as a low cost JTAG dongle when the target FPGA hardware has a 3.3V debug header / circuit, and this is the subject of this article.
An outline of steps for using an FTDI Mini Module as an Altera USB Blaster III JTAG dongle is provided below:
- Use either an FT2232H or FT4232H based Mini Module and high quality patch cables.
- Make sure your FPGA JTAG target is 3.3V compatible
- Depending on your choice of Mini Module, you may need to patch together basic voltage rails on the Mini Module using jumpers and patch cables (refer to Mini Module documentation).
- Download and install FTDI's FT_PROG utility. Review the FT_PROG documentation.
- Download and review the Altera "On-Board USB-Blaster III" documentatation that can be found at the following Altera forum post "Is there a specific driver for the USB Blaster III?".
- Reprogram the Mini Module EEPROM to emulate the USB Blaster III circuit.
- Install the Quartus Pro 25.1 USB Blaster III driver. This can be accomplished by installing the 25.1 programmer.
- Connect the Mini Module to the FPGA JTAG target using patch cables.
Note that we successfully tested both the FT4232H Mini Module and FT2232H-56Q Mini Module with Altera Quartus 24.1 Standard and discuss the results below. The latter module has the nice feature that the internal voltage rails are tied together by default using jumpers.
A disclaimer: use these instructions and the mini module with care and at your own risk. We have been using this module for programming various devices for a long time. However, there are associated risks, such as having the un-enclosed mini module short against something, wiring it improperly, using a faulty card, etc. However, if you exercise caution, review the mini module & device data sheets, and double check your connections, you should be fine.
Use FT_PROG to Program FTDI Mini Module as an Altera USB Blaster III
The detailed steps to reprogram the Mini Module's EEPROM is provided in the aforementioned Altera "On-Board USB-Blaster III" documentation. A screenshot of the FT_PROG utility is provided below that shows the programming template that was created from the detected & scanned Mini Module device.
After the template is configured properly, it can be applied / programmed.
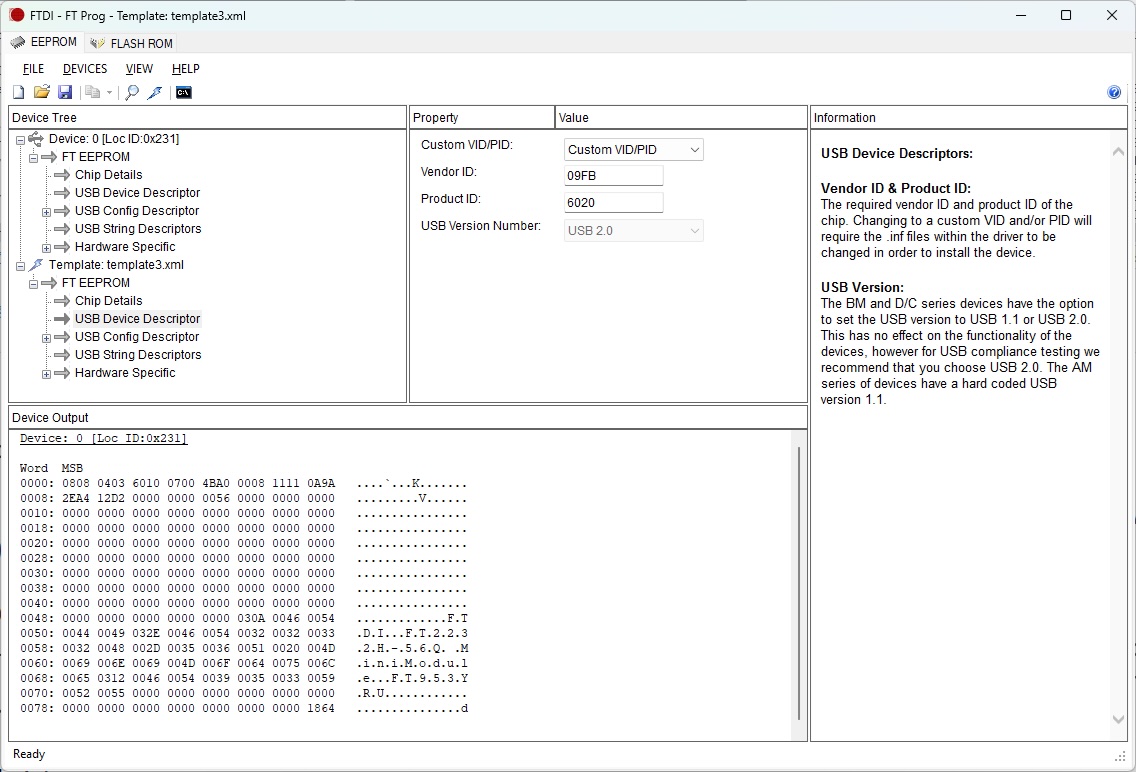
The table below provides the Vendor and Product ID codes for the Altera USB Blaster III Circuit depending on whether the circuit is based on the FT2232H or FT4232H.
| Altera VID | USB Blaster III PID | Device | Notes |
|---|---|---|---|
| 0x09FB | 0x6020 | FT2232H | Two Port Device |
| 0x09FB | 0x6024 | FT4232H | Four Port Device |
* Default FTDI Vendor ID: 0x0403.
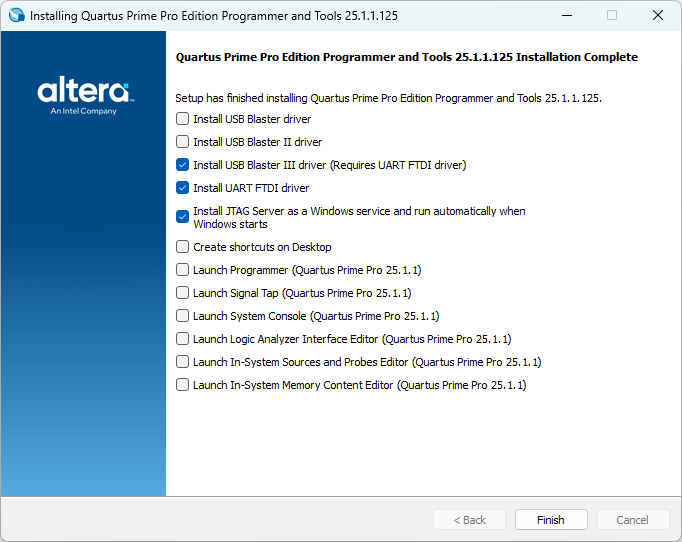
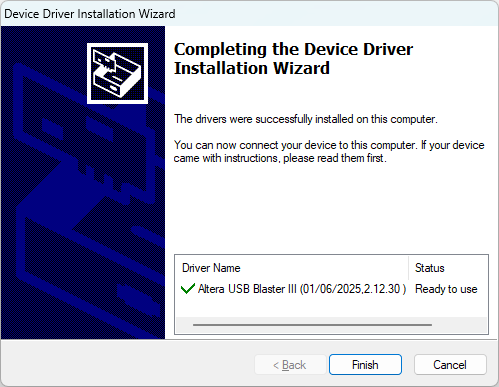
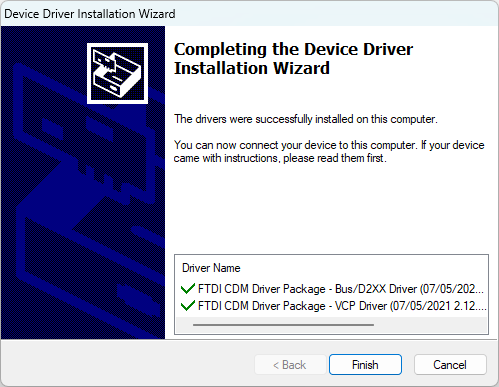
Install USB Blaster III and FTDI drivers using Quartus Pro 25.1
The screen shots below show the installation of the USB Blaster III and FTDI drivers on Windows 10 for the Quartus Pro 25.1 Programmer. Both Quartus Pro and Quartus Standard can make use of these drivers. We found this true for both Windows 10 and Ubuntu Linux 24.04.
Connect FT4232H Mini Module to Target
Below we describe how we wired our FT4232H Mini Module to our Altera FPGA Target, which utilizes the de facto Altera 10-pin JTAG pin assignment.
| MM Pin # | MM Pin Name | Target JTAG Pin # | Target Name |
|---|---|---|---|
| CN2-2 | GND | 2 | GND |
| CN2-7 | AD0 | 1 | TCK |
| CN2-9 | AD2 | 3 | TDO |
| CN2-10 | AD1 | 9 | TDI |
| CN2-12 | AD3 | 5 | TMS |
*Connection Notes:
- We do not connect power (3.3V) between the target board and Mini Module.
- Connections for MM follow USB-bus powered guidelines. The
following additional connections are required:
- CN3-1 is connected to CN3-3, which connects USB power to FTDI voltage regulator input.
- CN2-1 is connected to CN2-11, and CN2-3 is connected to CN3-22. This ties V3V3 to VIO on FTDI device.
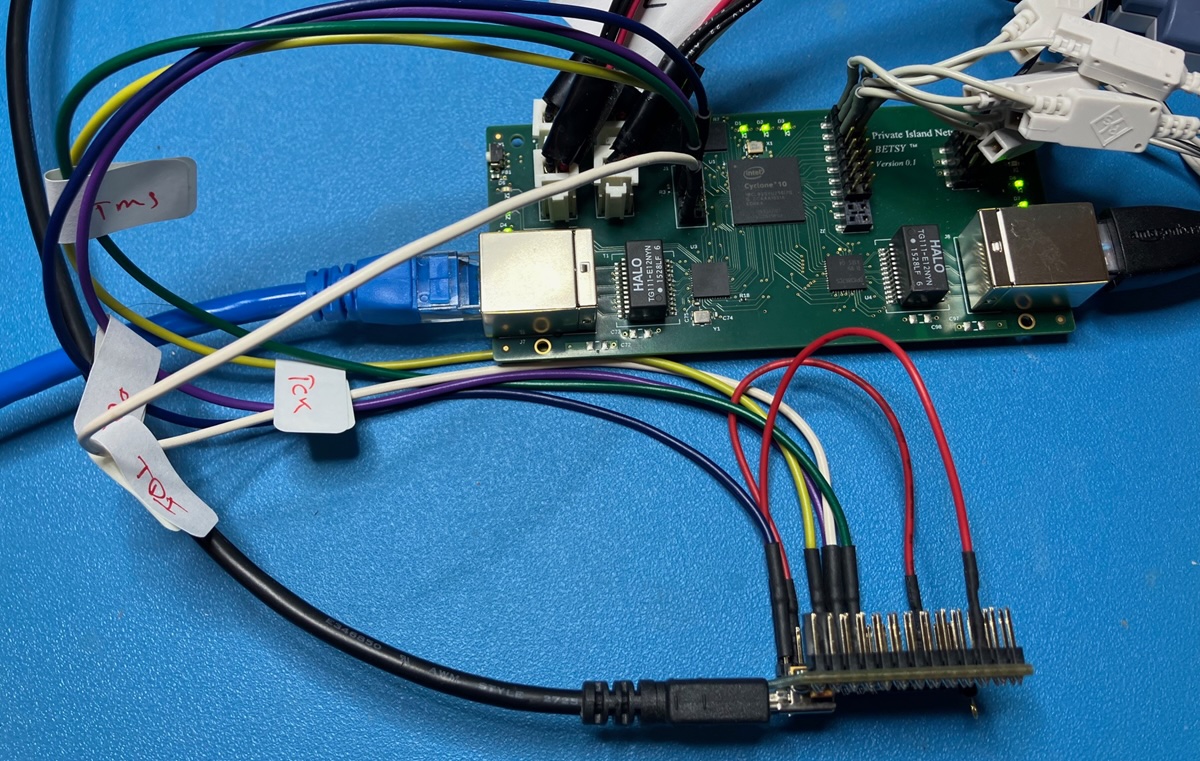
Lab Bench
Shown below is a picture of our FT4232H Mini Module connected to our pre-release Betsy™ target on our lab bench. Note that our patch cables are several inches long, and we achieve robust JTAG programming performance.
Note that we're using Altera Standard 24.1 Programmer and Signal Tap Logic Analyzer but utilizing the USB Blaster III driver installed with the Pro 25.1 Programmer.
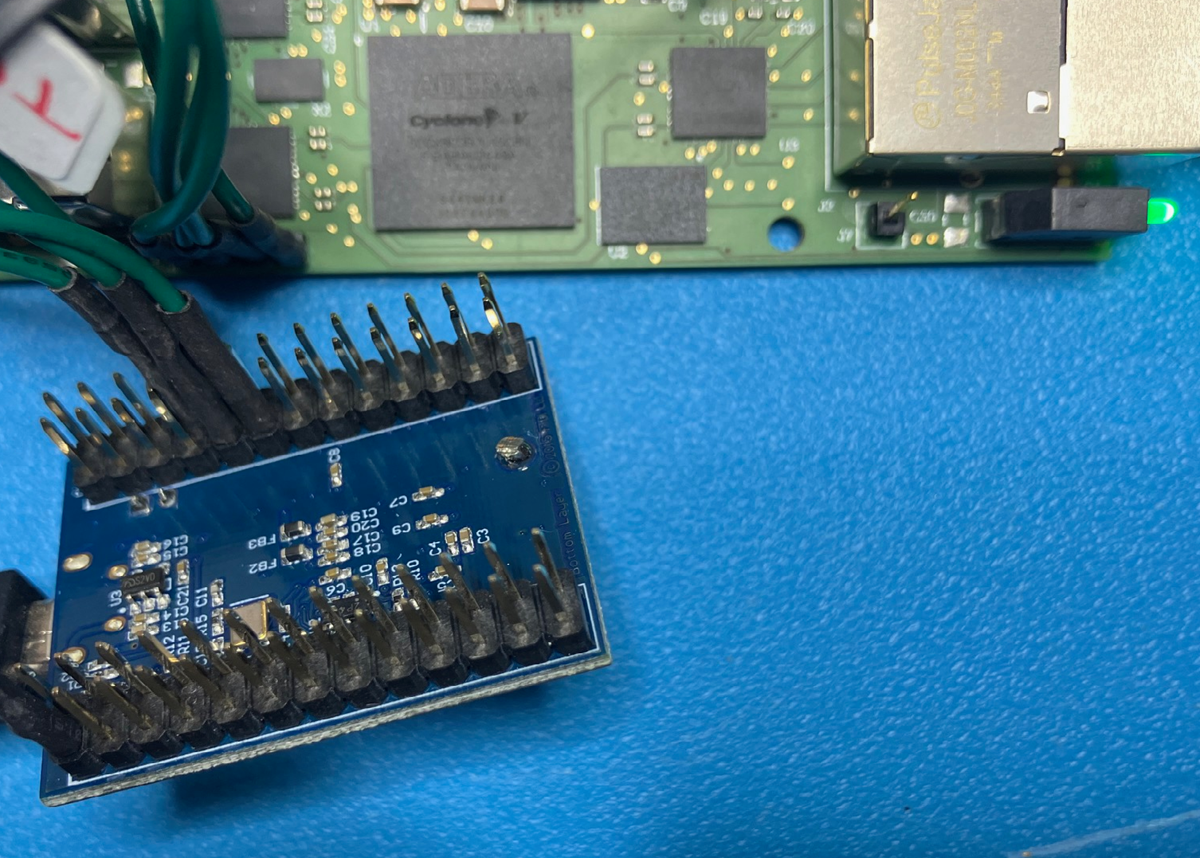
The next picture is of our FT2232H Mini Module connected to our under development OEM Cyclone 5GX networking board. This board uses a reduced JTAG pinout, so using the FTDI Mini Module as a JTAG dongle is very convenient.
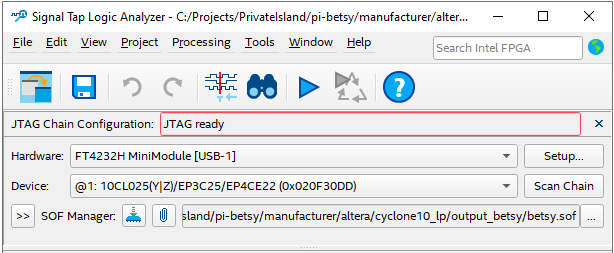
Connecting via Altera Standard Signal Tap Logic Analyzer
If everything is connected properly, we found the tools work without any issues on both Windows 10 and Ubuntu Linux 24.04. Shown below is a screenshot of Signal Tap Logic Analyzer connecting via the FT4232H Mini Module. Both programming and triggering work great.
More on JTAG
JTAG is a 4-wire protocol defined by the IEEE (Std 1149.1-2013). The signals that comprise the Test Access Port (TAP) are TCK, TMS, TDI, and TDO. Various implementations also make use of additional pins for test and programming (i.e., TRST). Support of these additional signals can be accomplished with the FT2232 device through general purpose I/Os; however, our implementation only makes use of the 4 core signals and ground.
Acknowledgement
We thank Carl Blow at Arrow Electronics for his support and ideas in helping to achieve USB Blaster III connectivity using Altera 24.1 Standard and FTDI devices. Carl is a tremendous source of knowledge with Altera FPGAs and an awesome FAE.
Additional References
- Altera forum post: Altera USB Blaster III LEDs usage
- Altera forum post: USB Blaster III VID/PID codes and documentation
- Altera forum post: Onboard UB3 patch and documents
- Altera USB-Blaster Download Cable User Guide


Date: Oct. 22, 2025
Author: Barry Walker
Comment: