Overview
This article shows the steps on how to configure a Windows 10 PC for static IP addressing using the Windows Control Panel. This can be useful when no DHCP server is available on the network (e.g., using a Windows 10 laptop for a demo).
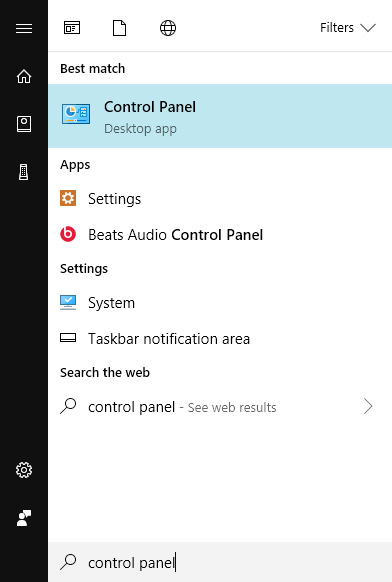
First, open the control panel. This can be done by pressing the Windows Start Button (lower left on task bar) and typing "control panel". You don't need to focus the mouse cursor before typing.
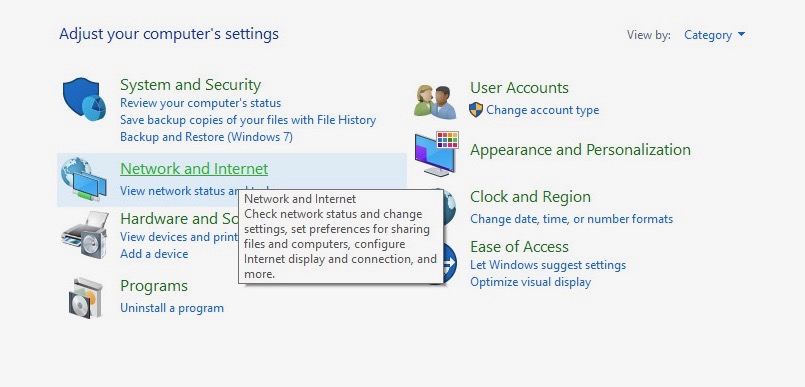
CLick "Network and Internet" as shown below.
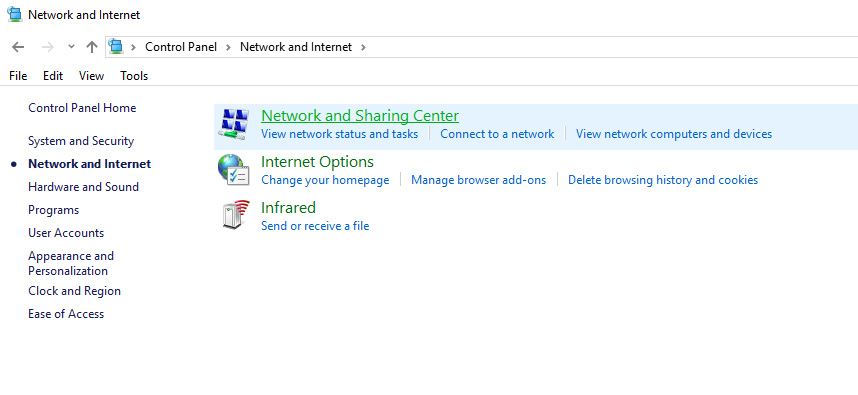
Click "view network status and tasks".
Click "Ethernet" next to "Connections"
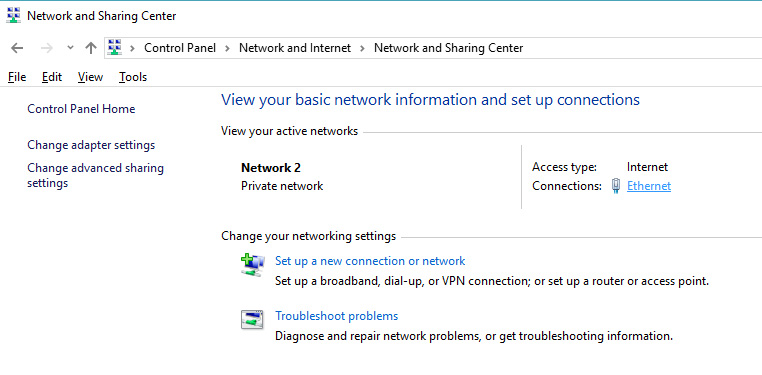
Now click the "Properties" button in the lower left.
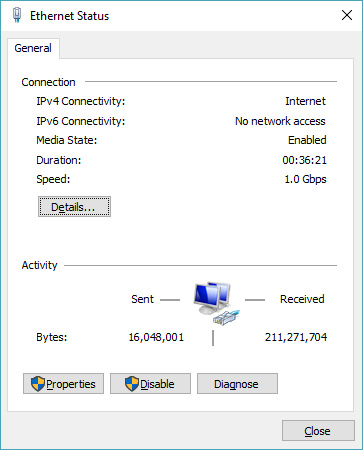
Click the line item "Internet Protocol Version 4 (TCP/IPv4)"
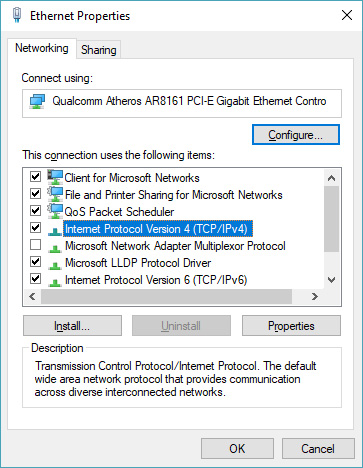
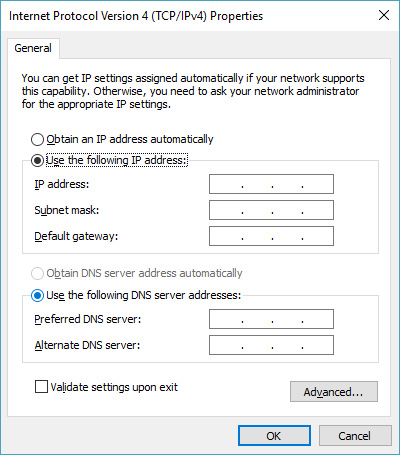
The last step is to type in the desired static IP address information. If you're doing this for the purpose of setting up a demo on a test network, then you should only need to type in an IP address (e.g., 192.168.3.100) and Subnet mask (255.255.255.0).
Once finished, typically the easiest way to verify your changes is to "ping" something else on the network. Open up a power shell and do the following:
> ping <address>
Keep in mind that you're pinging the address of another device (e.g., camera) on your network, not your own.

